Remember when changing background colors in WordPress meant messing with code and hoping you didn’t break anything? We sure do. We’ve watched WordPress evolve from those early days to the current block editor system we have now.
While the block editor has made customization much more accessible, we still see many website owners struggling to get their background colors just right.
Through running multiple WordPress sites and helping thousands of users, we’ve mastered the most efficient ways to handle these customizations.
Let us show you the exact methods we use to change background colors in the block editor – techniques that will work regardless of your WordPress experience level or theme choice.
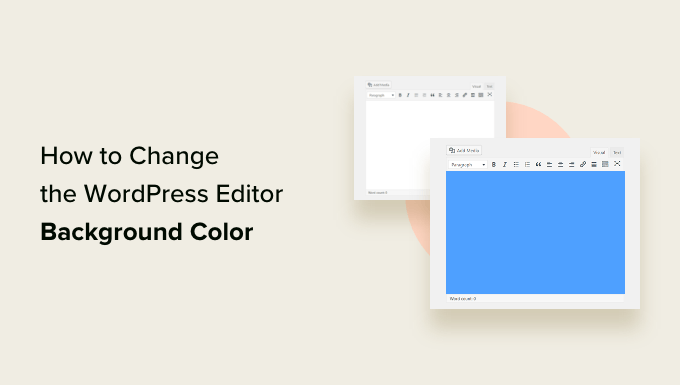
Note: This guide covers changing the editor color in WordPress admin. If you are looking to change the background color in the WordPress front end, then you can scroll down to the bonus section or see our tutorial on how to change background color in WordPress.
Why Change the Background Color of the Block Editor in WordPress?
You may want to change the background color of the WordPress block editor for a number of reasons.
For instance, most modern WordPress themes use the same background color for the block editor as the live website, including Astra, OceanWP, GeneratePress, and more.
However, if your WordPress theme doesn’t use the same colors, then the appearance of your post inside the editor will look quite different from what your users will see on the live website.
Another reason for changing the background color could be personal preference.
For instance, by default, the block editor uses a plain white background. Some users may find it a bit stressful to look at the white screen for long hours. Eye strain can be a real issue for many people, and the default white background is not easy on the eyes.
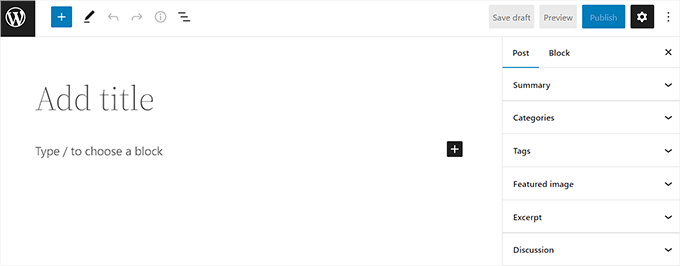
That being said, let’s see how you can easily change the WordPress editor background color.
How to Change the WordPress Editor Background Color
You can easily change the WordPress editor background color by adding custom code to your theme’s functions.php file.
However, even the smallest error in the code can break your website and make it inaccessible.
That’s why we recommend using the WPCode plugin.
After thorough testing, we have concluded that it is the easiest and safest way to add custom code to your WordPress website. To learn more, see our WPCode review.
First, you need to install and activate the WPCode plugin. For more instructions, please see our step-by-step guide on how to install a WordPress plugin.
Note: WPCode also has a free plan that you can use for this tutorial. However, the premium plan gives you access to more features, such as a code snippet library and conditional logic.
Upon activation, visit the Code Snippets » +Add Snippet page from the WordPress admin sidebar.
From here, click on the ‘Use Snippet’ button under the ‘Add Your Custom Code (New Snippet)’ option.
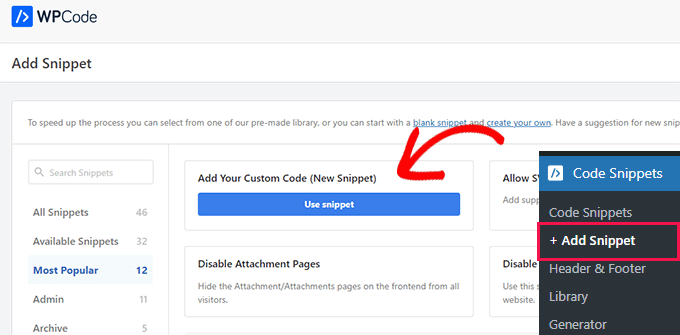
This will take you to the ‘Create Custom Snippet’ page, where you can start by typing a name for your code snippet. This is just for you and can be anything that will help you identify the code.
Next, select ‘PHP Snippet’ from the prompt that appears after clicking the ‘Code Type’ menu in the top-right corner of the screen
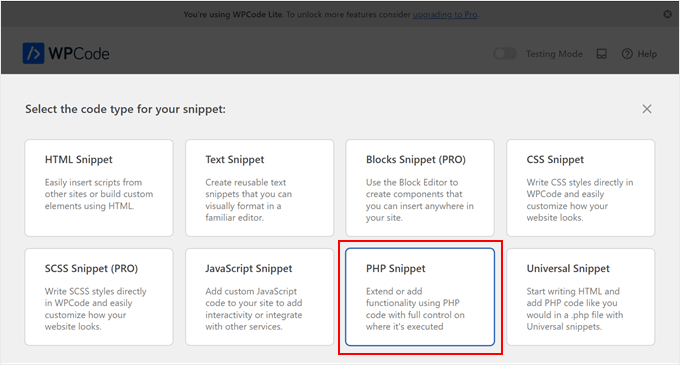
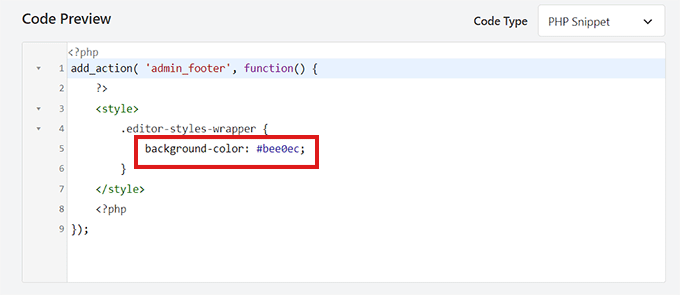
After that, copy and paste the following code into the ‘Code Preview’ box:
add_action( 'admin_footer', function() {
	?>
	<style>
		.editor-styles-wrapper {
			background-color: #bee0ec;
		}
	</style>
	<?php
});
Once you have done that, you need to look for the following code in the PHP snippet you just pasted:
background-color: #bee0ec;
Then, you have to add the hex code of your preferred color next to the background color option. If you don’t want to use a hex code, you can use some basic color names such as ‘white’ or ‘blue’ instead.
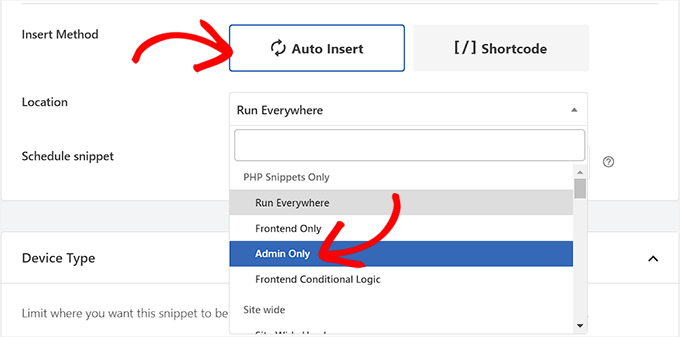
After that, scroll down to the ‘Insertion’ section and choose the ‘Auto Insert’ option.
Next, you must select the ‘Location’ of the code snippet as ‘Admin Only’ from the dropdown menu.
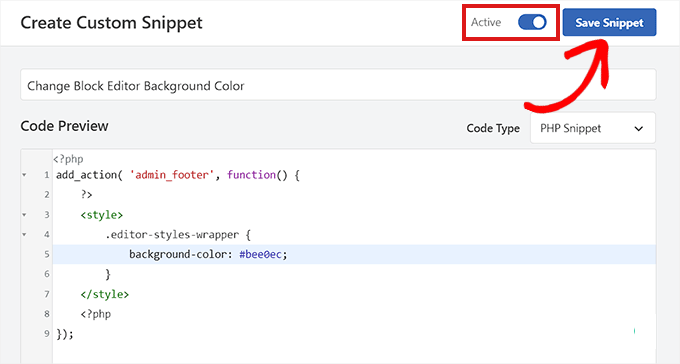
After that, go back to the top of the page and toggle the ‘Inactive’ switch to ‘Active.’
Finally, don’t forget to click on the ‘Save Snippet’ button to store your changes.
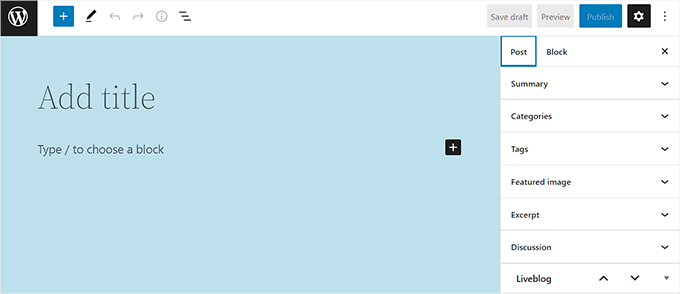
Now, go visit the block editor from the admin sidebar.
This is how the block editor looked on our site after adding the PHP code snippet.
Video Tutorial
If you would rather watch a video, check out our YouTube tutorial on how to customize the background color of the WordPress block editor:
Bonus: Change the Background Color in WordPress
If you want to change the background color on your website’s front end, then you can do that by visiting the Appearance » Customize» screen from the WordPress dashboard.
This will launch the theme customizer, where you must click the ‘Colors & Dark Mode’ tab in the left column. Keep in mind that your customizer may look different depending on the theme that you are using.
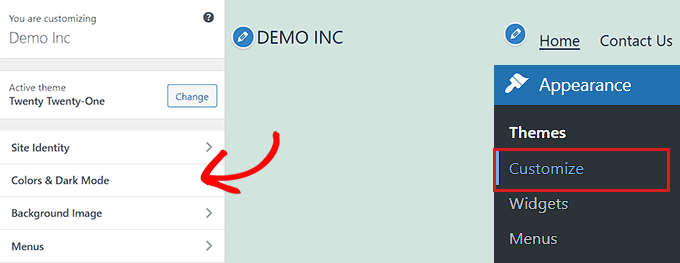
This will open a new panel in the sidebar where you must click the ‘Select Color’ option.
The Color Picker will now open on your screen, and you can choose your preferred background color. Once you are done, remember to click the ‘Publish’ button at the top to store your settings.
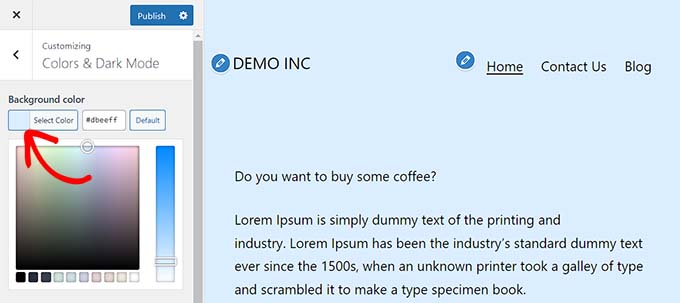
You can also change the text color, highlight color, button color, and more from the theme customizer. However, if you are using a block theme, then you will have to make these changes in the full site editor.
For more details on all of this, you can see our beginner’s guide on how to customize colors on your WordPress website.
We hope this article helped you learn how to easily change the WordPress editor background color. You may also want to see our ultimate guide on how to disable the fullscreen editor in WordPress or take a look at our top picks for the best Gutenberg blocks plugins for WordPress.
