Looking to create a custom homepage that truly showcases your WordPress site? First impressions matter, and at ReviewScout, we’ve helped countless users create eye-catching homepages that engage visitors.
The default WordPress homepage (while functional) often isn’t the most inviting way to welcome your audience. You want a homepage that highlights your best content, products, or services. A design that captivates and keeps them on your site.
In this guide, we will walk you through 3 easy ways to create a custom homepage in WordPress, even if you’ve never done it before.

What Is a Homepage?
A homepage is the first page visitors see when they type in your domain name. For many people, this homepage is their introduction to your business, blog, or website.

A good homepage will make visitors want to learn more about your website. It will also provide easy access to the links, search bars, and menus that help visitors find interesting content.
The default homepage in WordPress shows your latest blog posts, which may be a good fit for personal blogs or hobby bloggers.
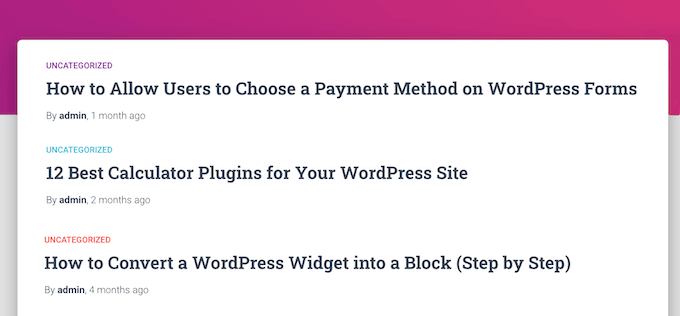
However, if you run a business using your WordPress website, you may want to create a custom homepage instead to highlight your products and services.
The good news is that WordPress makes it easy to show a custom page as your homepage rather than the default list of recent posts.
How Do I Set a Custom Page as the WordPress Homepage?
In this guide, we will show you a few different ways to create a custom homepage. However, no matter what method you use, you will need to change your WordPress settings after creating the static homepage.
To do that, simply go to Settings » Reading in the WordPress dashboard.
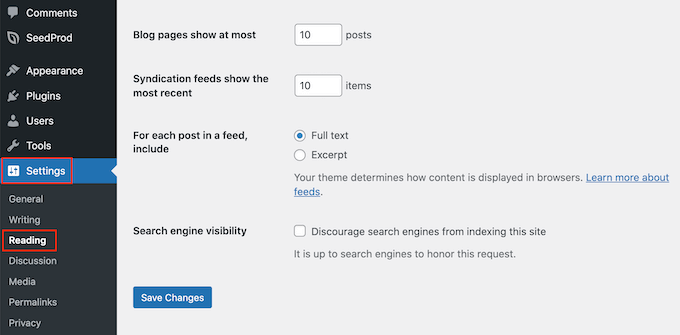
Here, scroll to ‘Your homepage settings’ and select ‘A static page.’
You can now open the ‘Homepage’ dropdown and choose the page that you want to use as the new homepage.
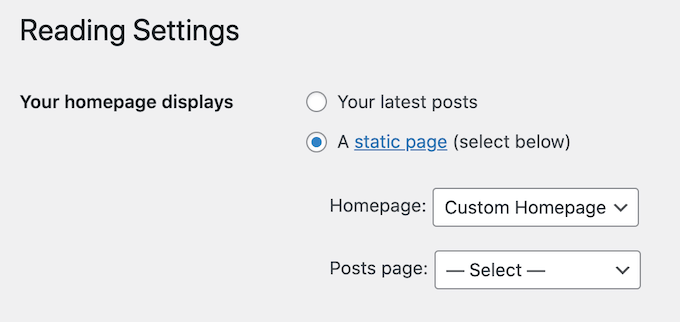
Then, simply scroll to the bottom of the screen and click on ‘Save Changes.’ You can now visit your site to see the new custom homepage live.
If you have a blog, then make sure to create a separate blog page to display your posts. Otherwise, visitors will struggle to find your latest blogs.
With that being said, let’s see how you can design a custom homepage in WordPress. Simply use the quick links below to jump straight to the method you want to use:
Video Tutorial
If you prefer written instructions, then just keep reading.
Method 1: Create a Custom Homepage Template Using the Block Editor (No Plugin Required)
If you are using a block theme, then you can design a custom homepage template using the full site editor.
This method doesn’t work with every theme, so if you are not using a block-based WordPress theme, then you will need to use one of the other methods covered in this guide.
For more information about using the full site editor, check out our beginner’s guide to WordPress full site editing.
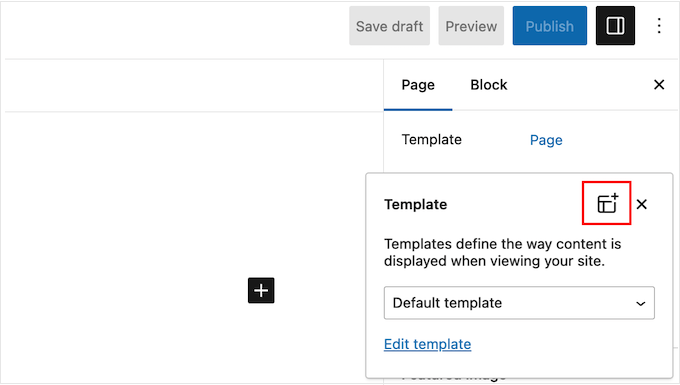
To start, simply create a new page or open an existing page that you want to use as the homepage. In the right-hand menu, click on the ‘Page’ tab and then select the link that appears next to ‘Template.’
The exact link text may vary depending on the template you are currently using.
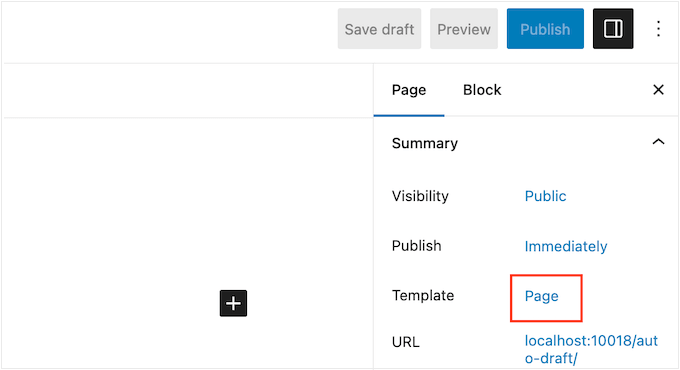
A popup will now appear with your current template.
Simply go ahead and click on the ‘New Template’ icon.
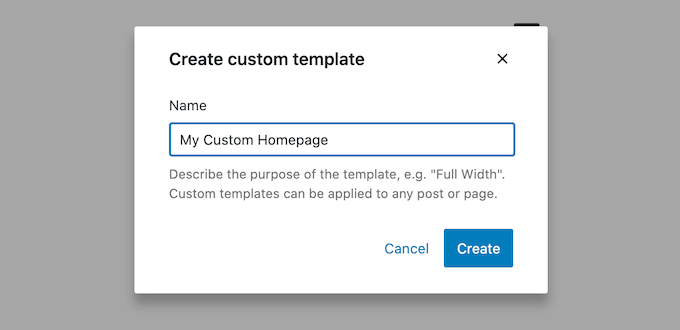
In the popup, give your template a name. The name is just for your reference, so you can use anything you want.
After that, go ahead and click on ‘Create’ to launch the full site editor.
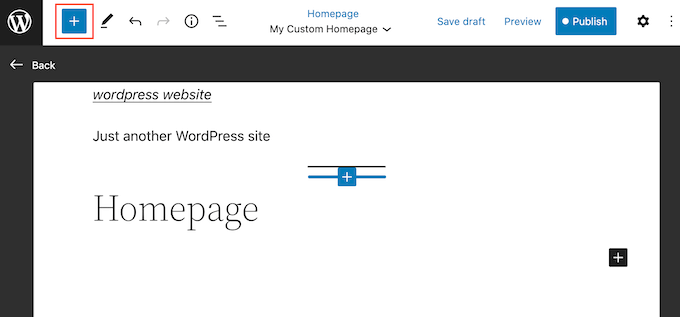
The template editor works similarly to the standard WordPress block editor.
To add blocks to your custom homepage, just click on the blue ‘+’ button. You can then drag and drop any block onto your layout.
Since we are creating a custom homepage, you will typically want to start by adding a big hero image, such as your website’s logo or banner.
To do this, simply find the Image block in the left-hand menu and then add it to your layout using drag and drop.
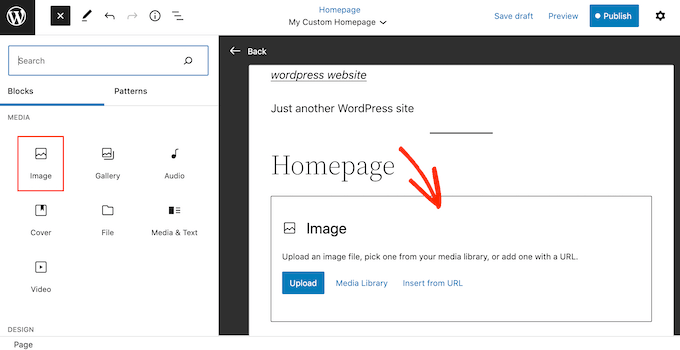
You can now either choose an image from the WordPress media library or upload a new file from your computer.
To get more engagement, you may want to show recent comments on your homepage by adding a Latest Comments block.
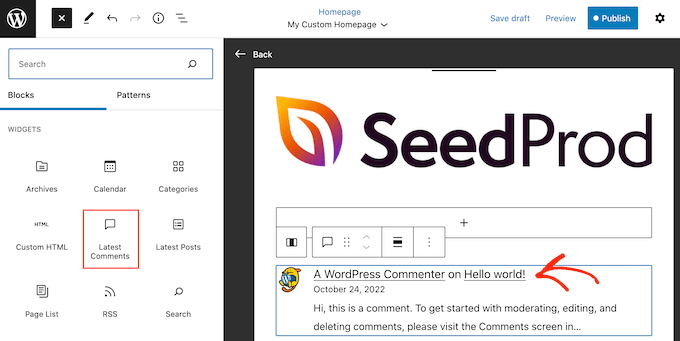
For more information, please see our guide on how to show comments on the homepage of your WordPress theme.
A good homepage helps visitors find interesting content. With that being said, it’s a good idea to add a Navigation block to your custom homepage.
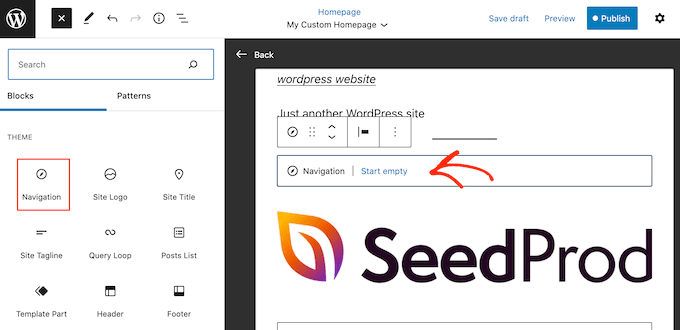
To learn more, please see our step-by-step guide on how to add custom navigation menus in WordPress themes.
After adding a block, make sure you click to select it in your layout. You can then configure the block using the settings in the right-hand menu and the buttons in the mini toolbar.
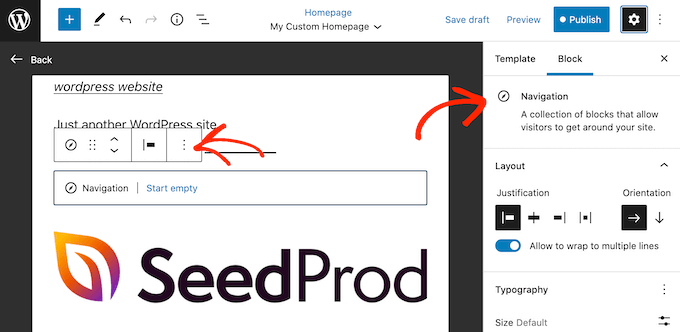
To build your custom homepage, simply keep adding more blocks and then configure them using the full site editor settings.
For example, you may want to add blocks such as Latest Posts, Search, Social Icons, Tag Cloud, and more.
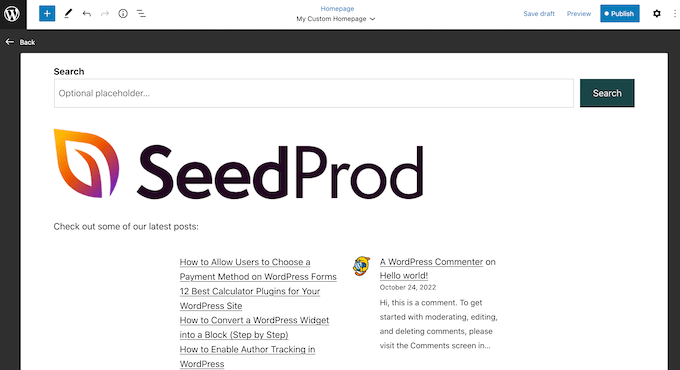
When you are happy with how the template looks, click on the ‘Publish’ button.
The page you created earlier will now be using the new homepage template. You can now tell WordPress to use this page as your homepage by following the process described above.
Method 2: Create a Custom Homepage in WordPress Using a Page Builder (Recommended)
The WordPress block-based editor allows you to create a custom homepage using the tools you are already familiar with. However, it doesn’t work with all themes and is limited in flexibility and features.
Plus, while the WordPress theme customizer exists for non-block theme users, it’s not the most user-friendly option, as it doesn’t come with a drag-and-drop feature.
If you want to create a completely custom homepage that works with any WordPress theme, then you will need a page builder plugin.
For this method, we will be using SeedProd. It is the best page builder plugin on the market and allows you to create a custom homepage using a simple drag-and-drop editor.
It also comes with 300+ professionally designed templates and ready-made blocks that you can use on your homepage.
Note: There is a SeedProd free version available on WordPress.org, but we will be using the Pro version since it has more templates, blocks, and features.
The first thing you need to do is install and activate the SeedProd plugin. For more details, see our step-by-step guide on how to install a WordPress plugin.
Upon activation, you need to enter your license key.
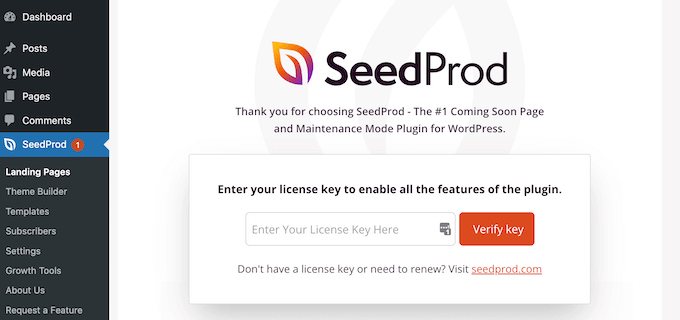
You can find this information in your account on the SeedProd website. After entering the license key, go ahead and click the ‘Verify Key’ button.
Create a New Homepage With SeedProd
At this stage, you need to visit SeedProd » Pages and click on the ‘Add New Landing Page’ button.
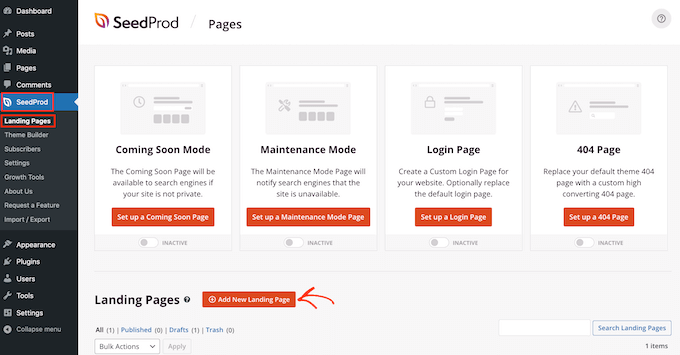
After that, it’s time to choose a template for your custom homepage. SeedProd has lots of professionally designed templates that you can customize based on your WordPress site’s needs.
To select a template, simply hover your mouse over it and then click the ‘Checkmark’ icon.
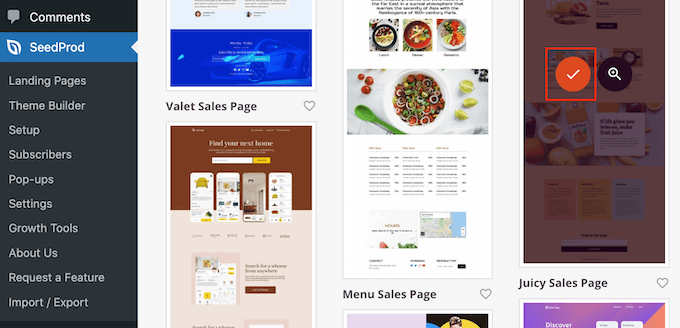
We are using the ‘Juicy Sales Page’ template in all our images, but you can use any design.
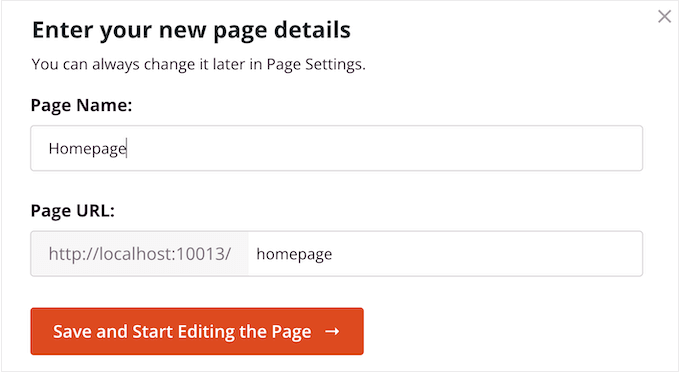
Next, go ahead and type in a name for the custom homepage. SeedProd will automatically create a URL based on the page’s title, but you can change this URL to anything you want.
When you are happy with the information you have entered, click on the ‘Save and Start Editing the Page’ button.
Next, you will be taken to the SeedProd drag-and-drop page builder, where you can customize your template.
The SeedProd editor shows a live preview of your design to the right and some block settings on the left.
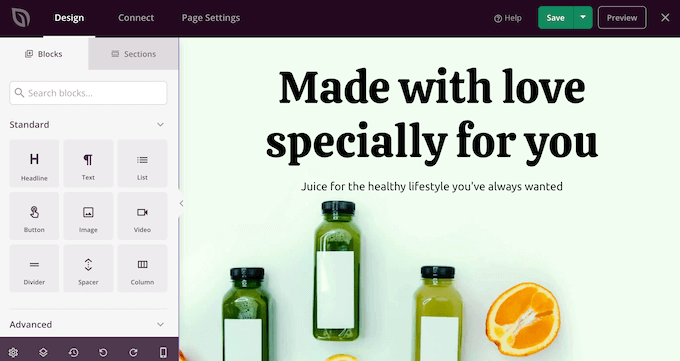
The left-hand menu also has blocks that you can drag onto your layout.
For example, you can drag and drop simple blocks like buttons and images or use advanced blocks such as the countdown timer, contact form, social sharing buttons, and more.
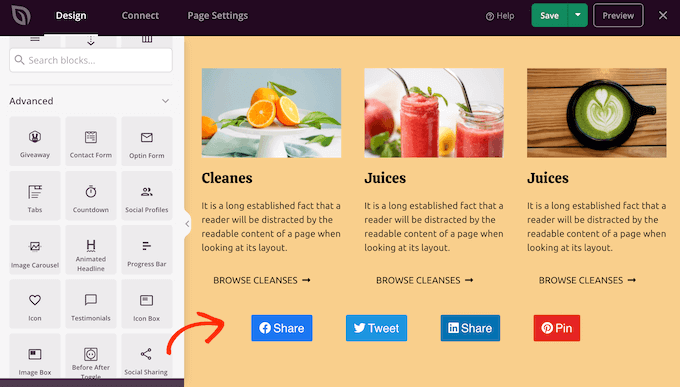
To customize any block, simply click to select it in your layout.
The left-hand menu will now show all the customization options to configure that block. You can also change the page’s background colors, add background images, or change the color scheme and fonts to better match your brand.
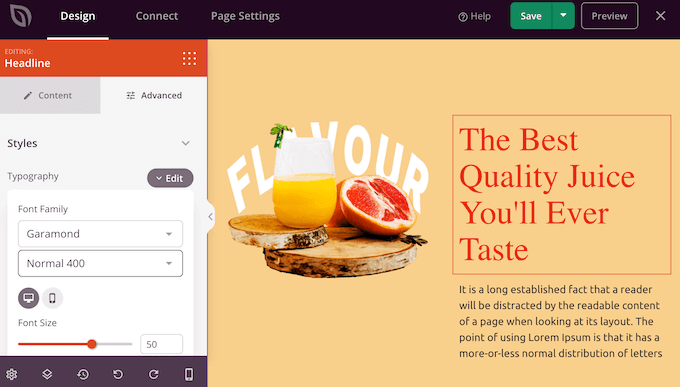
You can even use CSS animations to grab the visitor’s attention.
To start, you will want to replace any placeholder images with your own photos or custom logo. To do this, simply click to select any Image block in the live preview.
In the left-hand menu, click on the ‘Select Image’ button.
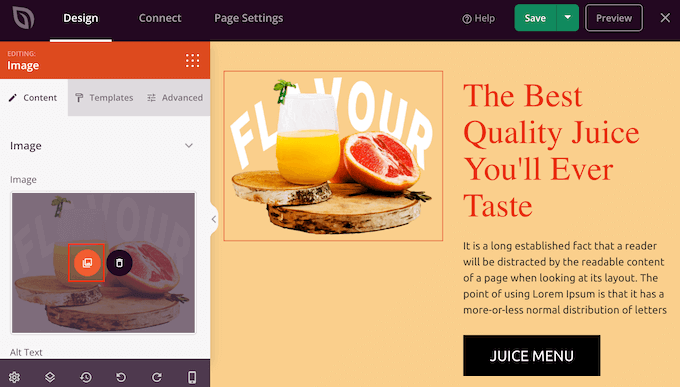
You can now either choose an image from the WordPress media library or upload a new file from your computer.
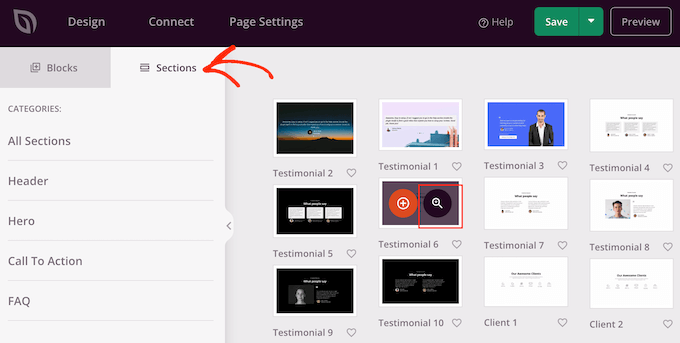
SeedProd comes with ‘Sections,’ which are collections of blocks that are often used together.
For example, SeedProd has a header, hero image, call to action, testimonials, contact form, FAQs, features, footer sections, and more. These can help you create a custom homepage, fast.
To look through the different sections, simply click on the ‘Sections’ tab. To preview any section, just hover your mouse over it and then click on the magnifying glass icon.
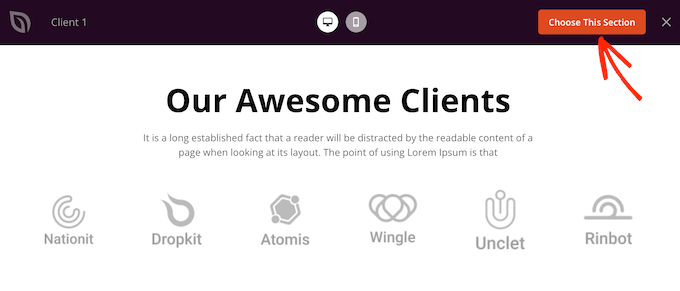
To add the section to your design, click on ‘Choose This Section.’
This will add the section to the bottom of your homepage.
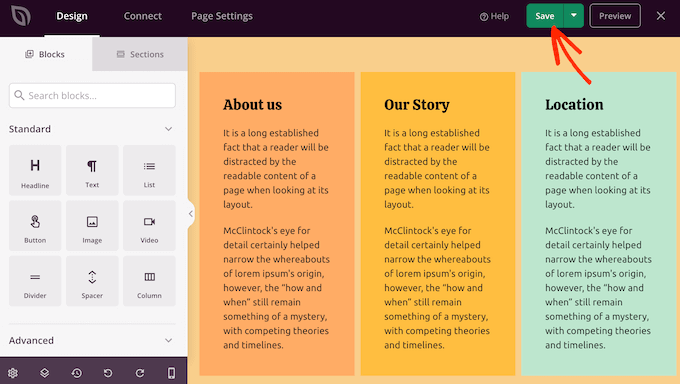
You can move sections and blocks around your layout using drag and drop.
When you are happy with how the homepage looks, don’t forget to click the ‘Save’ button to store your changes.
Connect Your Homepage With an Email Marketing Service
If you plan to run an email marketing campaign, the homepage is one of the best places to display your signup form.
The great thing about SeedProd is it makes it super easy to connect your homepage to popular email marketing services like Constant Contact.
To do this, simply click on the ‘Connect’ tab and then select your email service provider.
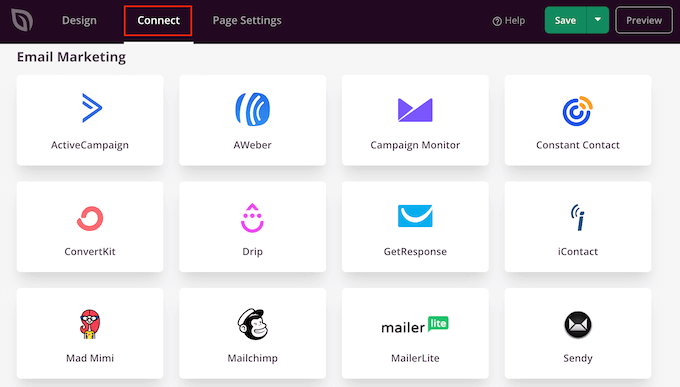
SeedProd will now show how to connect the homepage with your email marketing service.
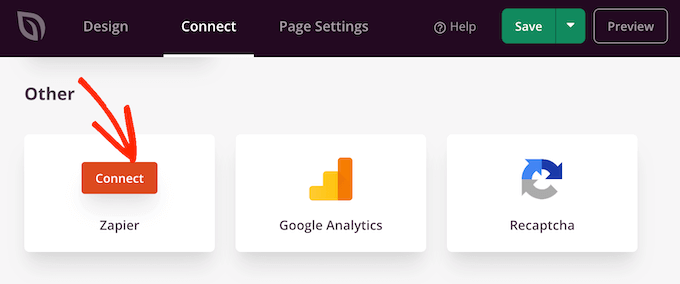
If your provider isn’t listed, then don’t worry. SeedProd works with Zapier, which acts as a bridge between SeedProd and more than 3000+ other apps.
Just scroll to the ‘Other’ section and hover over ‘Zapier.’ When the ‘Connect’ button appears, give it a click and then follow the onscreen instructions to connect SeedProd and Zapier.
Publish Your SeedProd Homepage
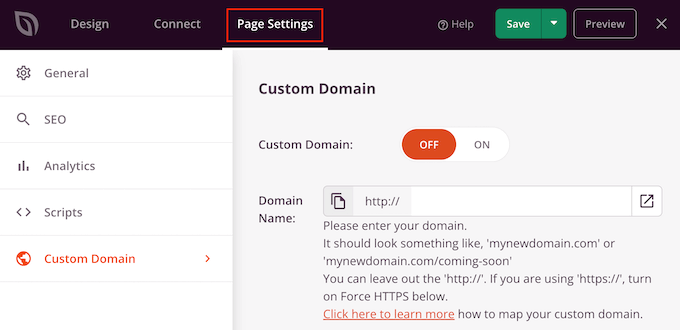
Once you have gone through all the previous steps, you are ready to publish your custom homepage. Simply click on the ‘Page Settings’ tab.
There are more options under the Page Settings tab that you may want to look at. For example, you can change the SEO settings, edit the page title, and connect a custom domain.
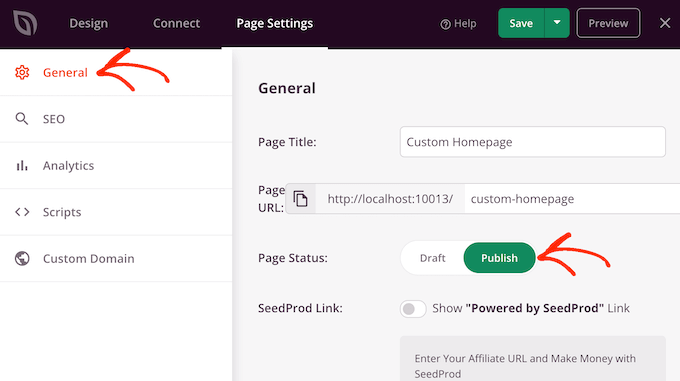
When you are happy with how the page is set up, go ahead and select the ‘General’ tab.
You can now click on the ‘Page Status’ toggle to change it from ‘Draft’ to ‘Publish.’
Now, you simply need to head over to Settings » Reading and set this page as your new custom homepage.
Method 3: Manually Create a Custom Homepage in WordPress (Coding Required)
Another way to create a custom homepage is using code, which gives you complete control over how your website looks. However, this method can be complicated, and coding mistakes can cause all kinds of common WordPress errors.
With that in mind, we don’t recommend this method for beginners.
Your WordPress theme is made up of many different files. Some of these files are called templates, and they control how different areas of your website look. For more information, please see our WordPress template hierarchy cheat sheet.
One of these templates is called front-page.php.
If your theme has this template, then WordPress will automatically use it to show the homepage. This means you can create a custom homepage by editing this file or replacing it with a new file.
To get started, you will need an FTP client such as FileZilla, or you can use the file manager supplied by your WordPress hosting provider.
If this is your first time using FTP, then you can see our complete guide on how to connect to your site using FTP.
After connecting to the server, go to /wp-content/themes/ and then open the folder for your current WordPress theme.
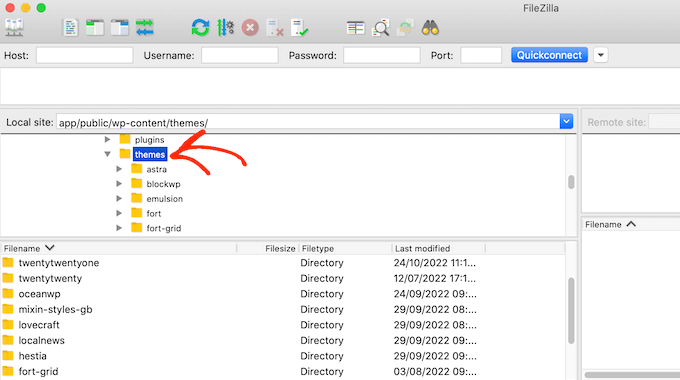
If this folder already has a front-page.php file, then you can go ahead and open that file in a text editor such as Notepad. You can then make any changes you want by editing the code.
If your theme doesn’t have a front-page.php file, then you can create a new file with the name front-page.php.
After that, you just need to upload front-page.php to your current theme’s folder on your WordPress hosting account.
As soon as you upload this file, WordPress will start using it to display your homepage. However, since the file is completely empty, you will see a blank page as your homepage.
To fix this, just open the file in a text editor app and start adding HTML code.
If you are starting with an empty file, then you can save yourself some time by using the existing code and templates in your WordPress theme.
For example, it usually makes sense to include the theme’s header and footer.
In the following sample code, we have removed the content and sidebars while fetching the header and navigation templates from the theme:
<?php /*
This page is used to display the static frontpage.
*/

// Fetch theme header template
get_header(); ?>
    <div id="primary" <?php astra_primary_class(); ?>>

    <div class="custom-homepage-container">

    You custom homepage code goes here

    </div>

    </div><!-- #primary -->
//Fetch the theme footer template
<?php get_footer(); ?>
Discover More Expert Tips to Customize WordPress Pages and Posts
Want even more control over your WordPress website and make more customizations to your pages and posts? Check out these articles below:
- How to Display Popular Posts by Views in WordPress
- The Anatomy of a High Converting Landing Page
- How to Customize WooCommerce Product Pages (No Code Method)
- How to Create a Custom Archives Page in WordPress
- How to Display Most Commented Posts in WordPress
- How to Easily Re-Order Posts in WordPress (Step by Step)
- How to Make Sticky Posts in WordPress
- How to Display Recent Posts From a Specific Category in WordPress
- How to Hide a Post From Homepage in WordPress
We hope this article has helped you create a custom homepage in WordPress. You may also want to see our expert picks of the best popular posts plugins for WordPress and our piece on the most important pages that every WordPress blog should have.
